Prior to recording
Review the Video Best Practice tips prior to recording for optimal recording results!
This tutorial consists of three parts:
1. Record with Panopto Capture.
2. And, Choose option (2a) to "Post" and "Reply" in a Canvas Discussion
3. Or, Choose option (2b) to "Submit" a Video Assignment
Use Panopto Capture to record video assignments or to engage in Canvas discussions with video.
It's user-friendly! Alternately you can use explore other recording options of your choice.
(1) Record with Panopto Capture
- Open your Canvas course.
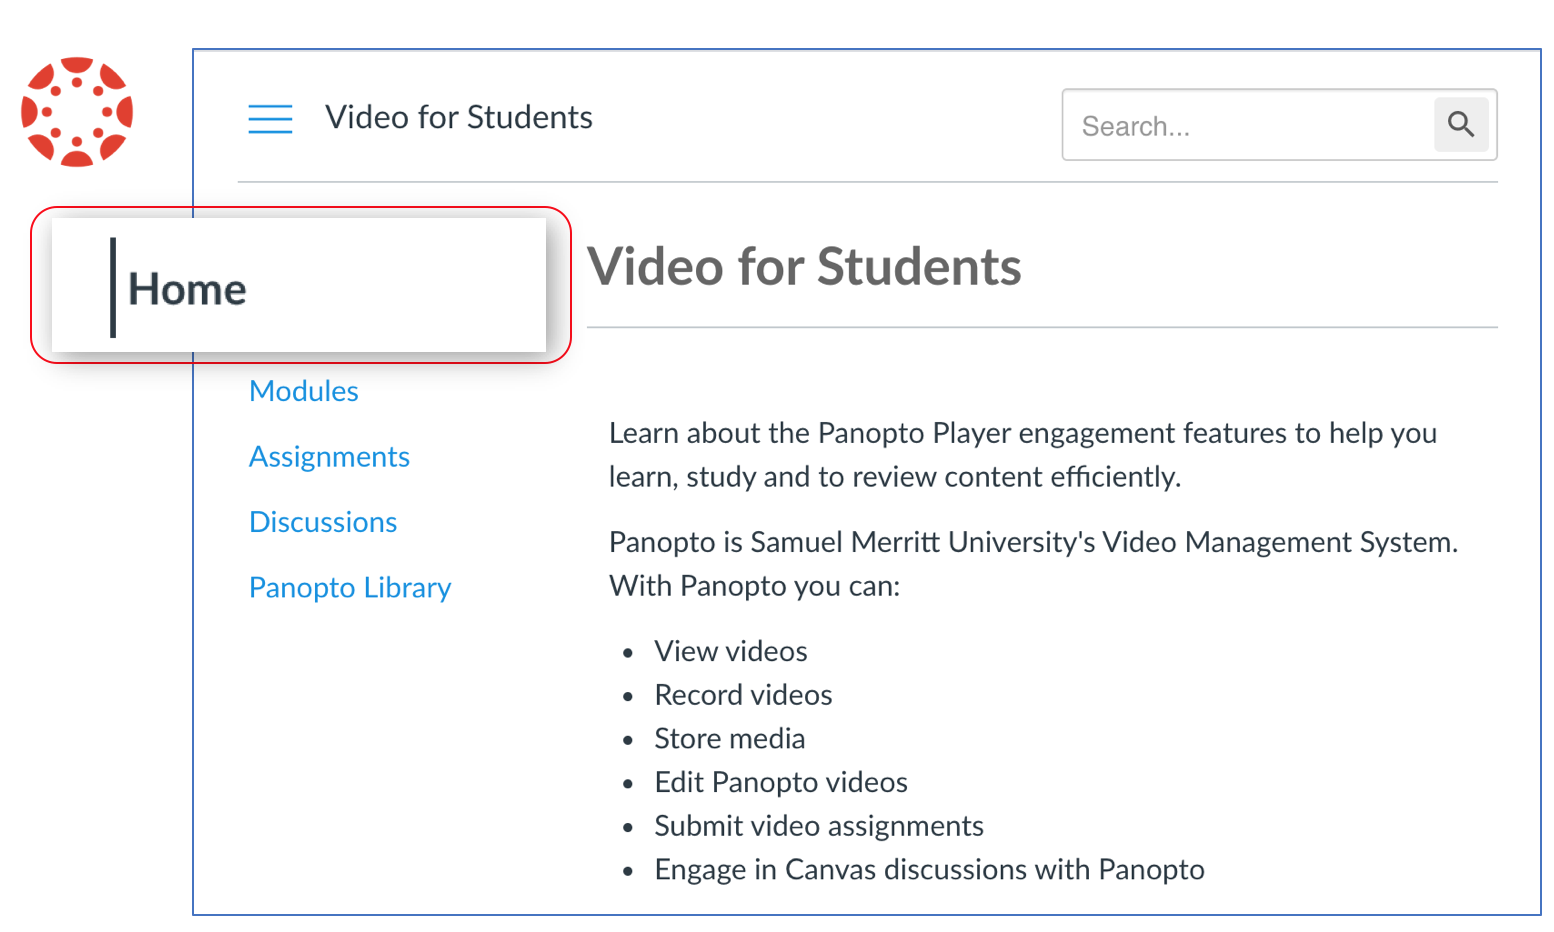
- Click the "Panopto Library" tab, then click the Panopto [assignments] folder for the course.
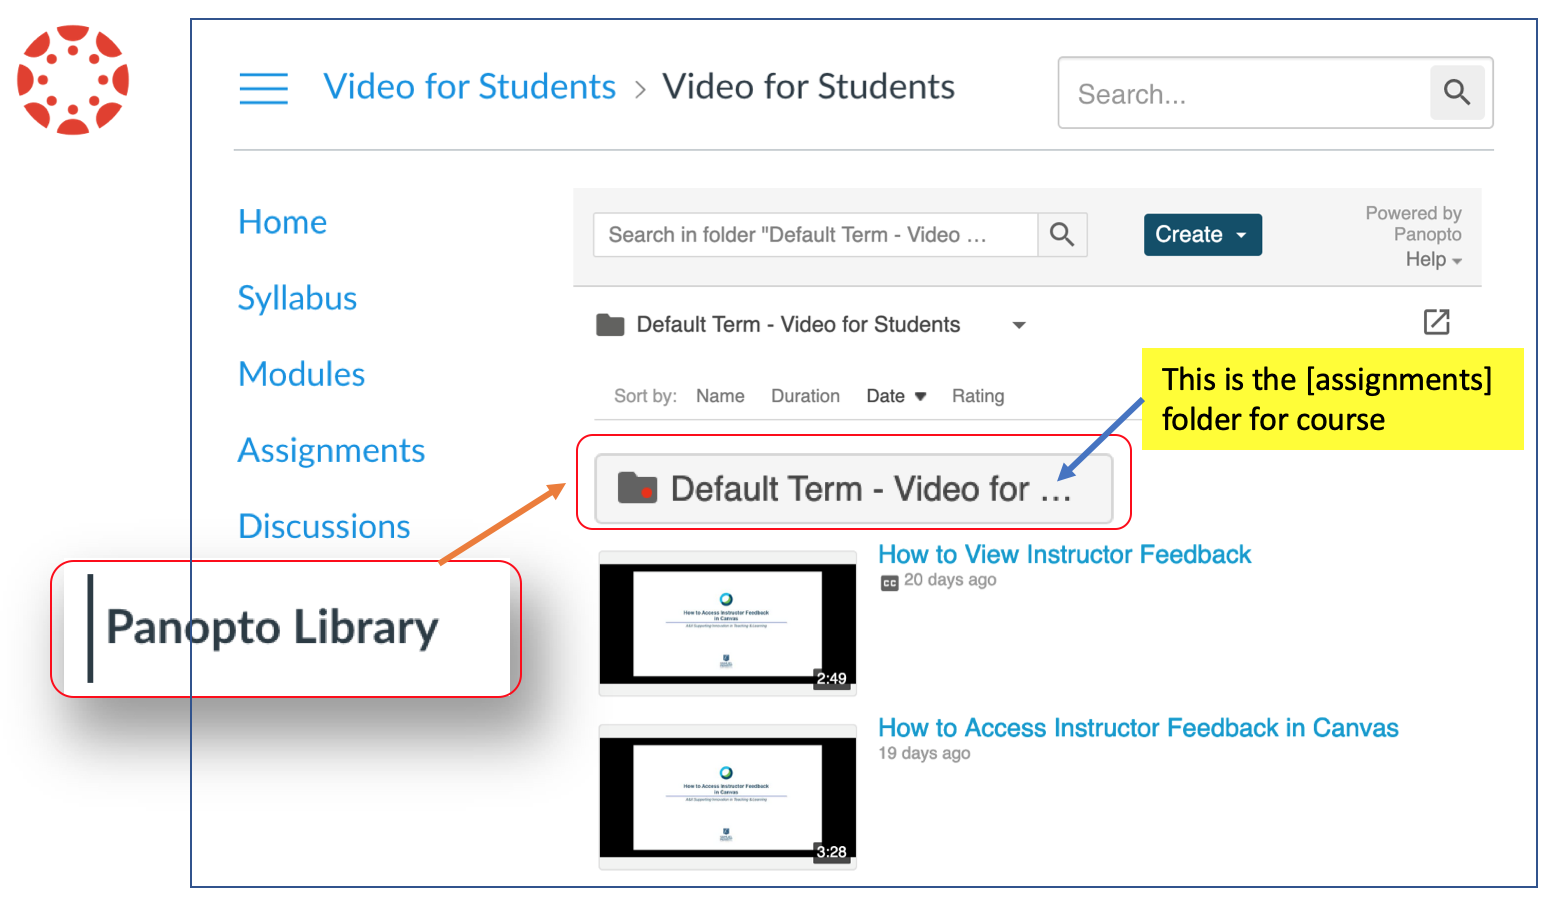
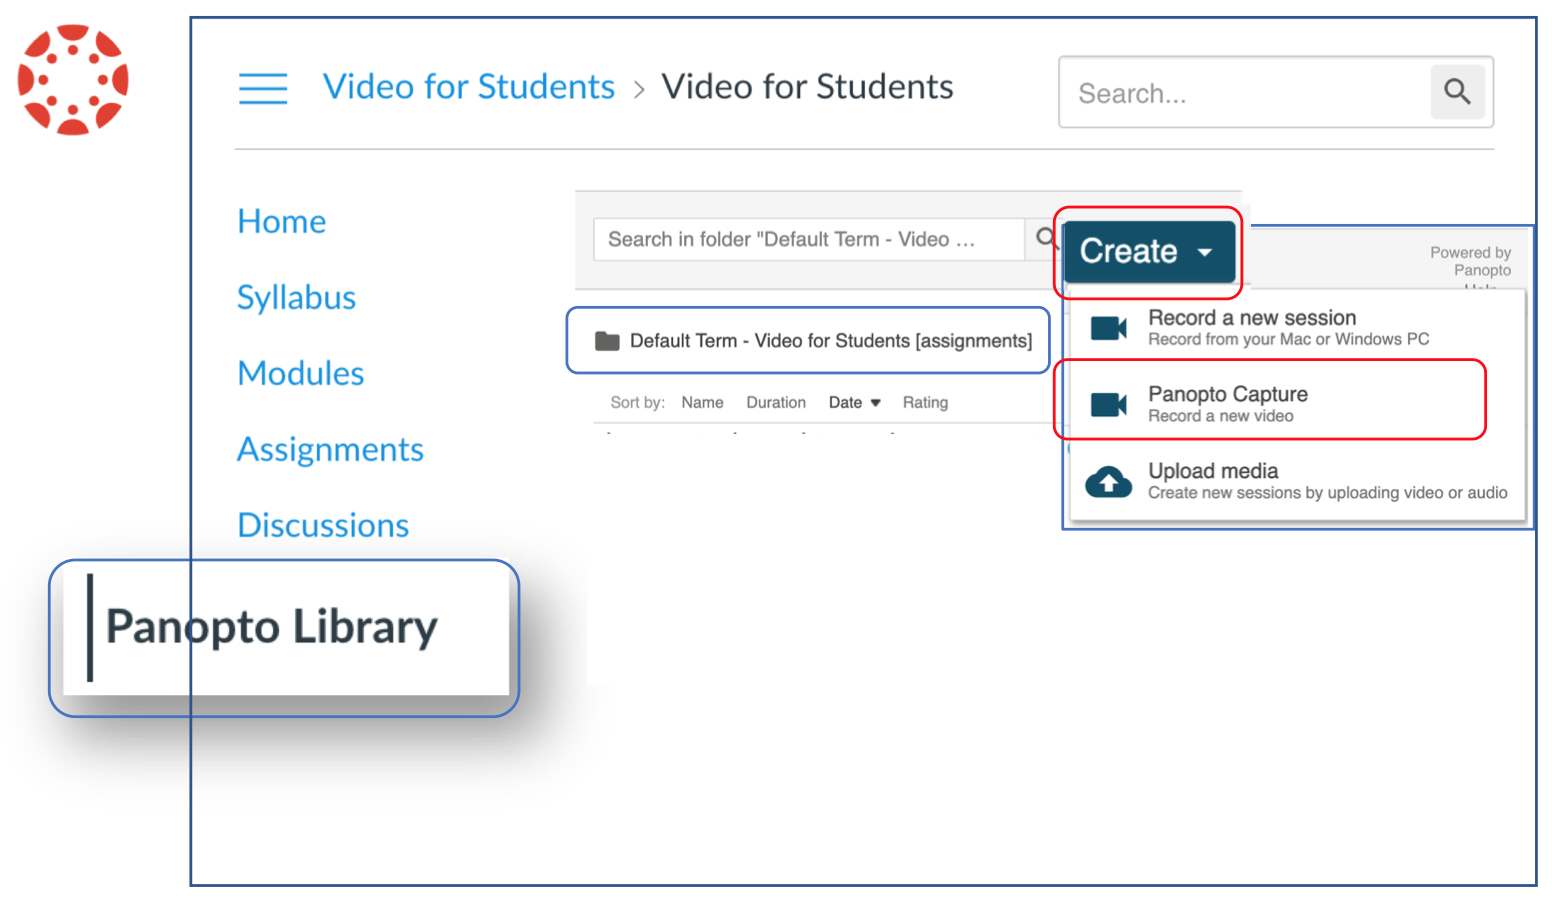
- Click the "Create" tab, and choose "Panopto Capture."
For recording video+audio only, enable the mic and webcam. Depending on the browser you will either:
a) click "Allow".
b) Or, select the "mic" and "webcam" icons to enable.
You're now ready to record video and audio only.
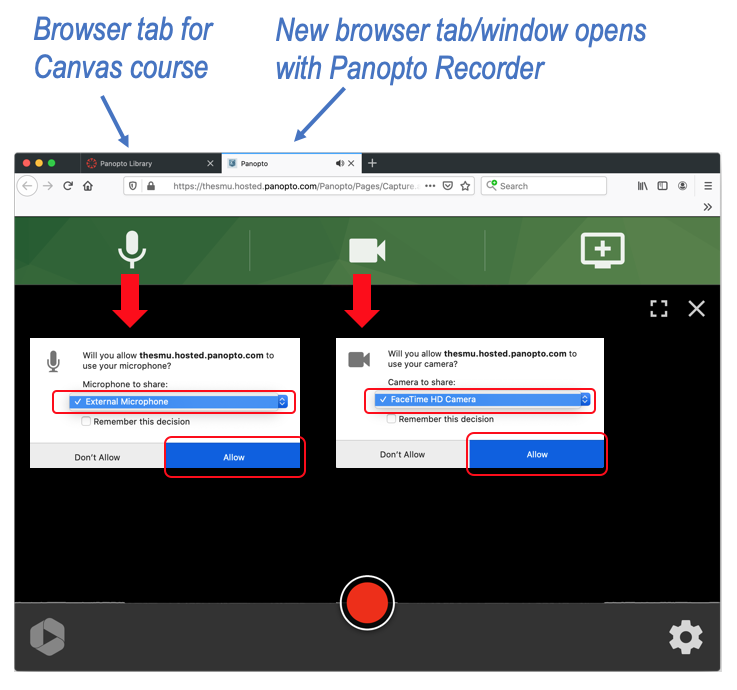
You are now ready to record video and audio only.
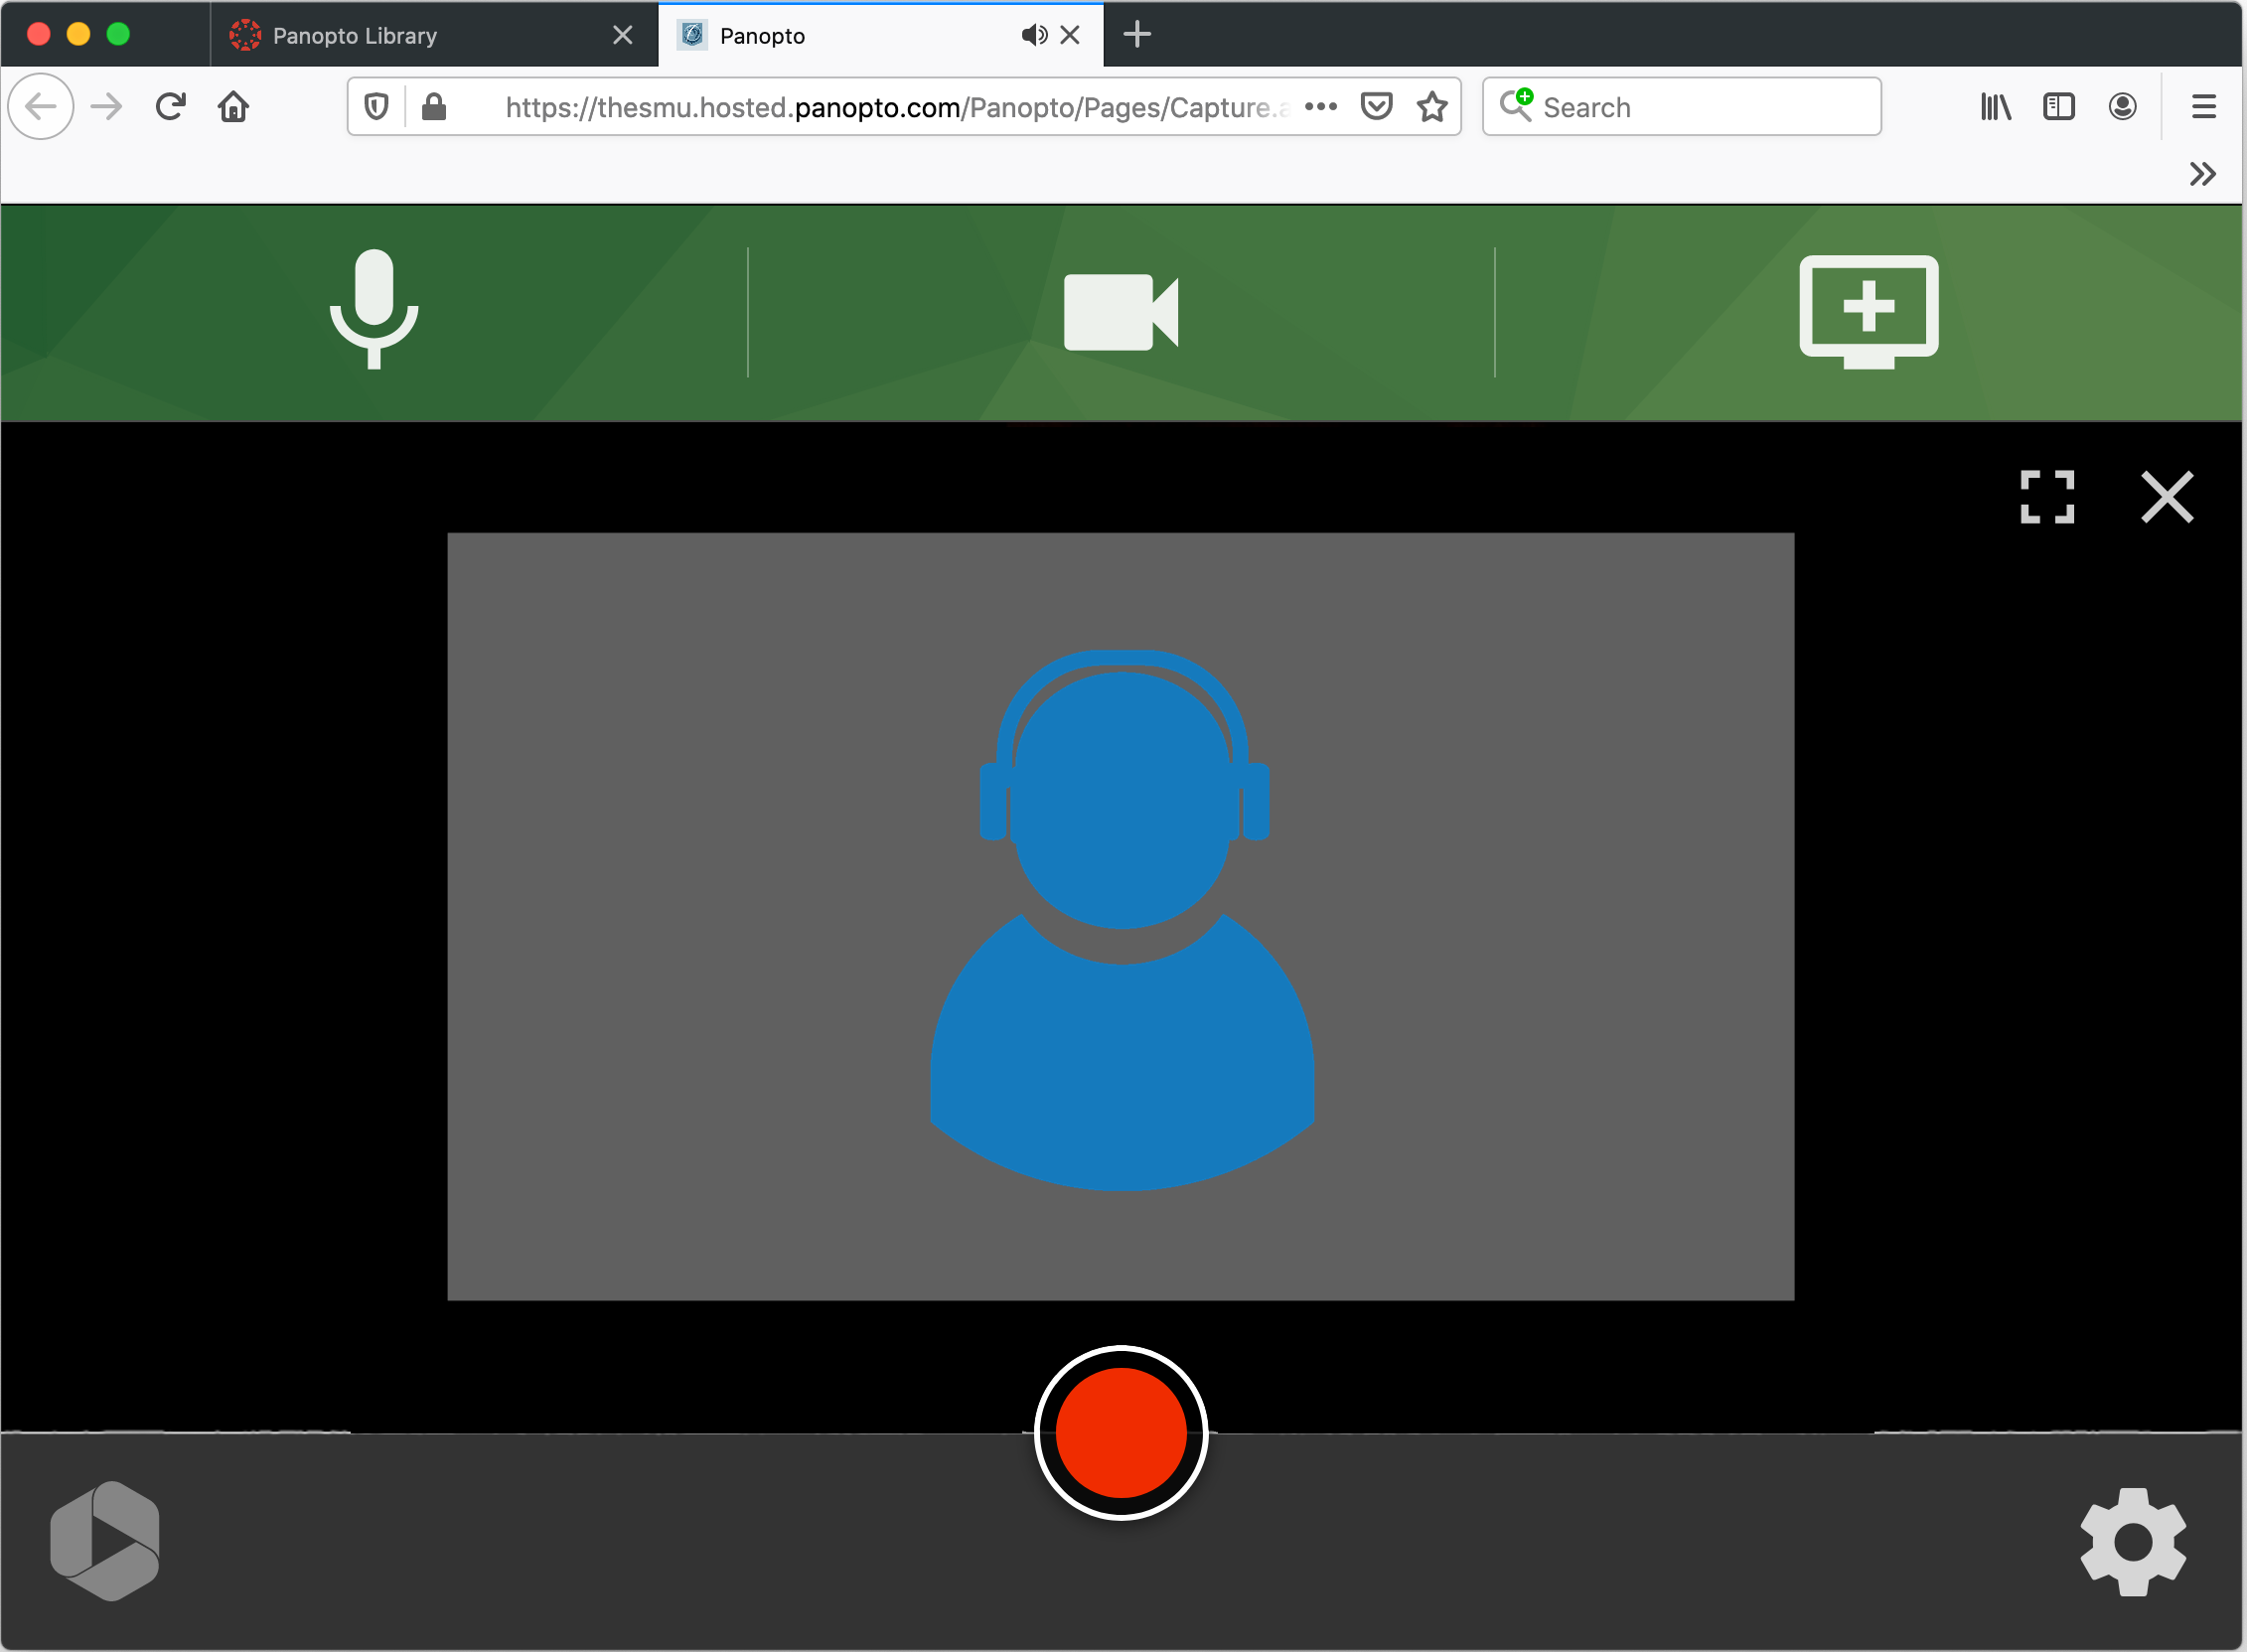
- Continue here if you want to RECORD VIDEO AND AUDIO ONLY.
(If you want to include screen capture skip this step, and go to step 6)
- Click "Record" to start recording. (smile and wait 5 seconds before you start talking).

Click "Stop" to end the recording. (smile and wait 5 seconds before you click stop).
.
(When you click "stop" go to step 11 to add title your video and to see /or select where the video will be stored).
- To configure the recording for VIDEO+AUDIO+ CAPTURE SCREEN (PowerPoint, web browser, computer desktop), continue below.
Depending on the browser you use, the option features will vary slightly.
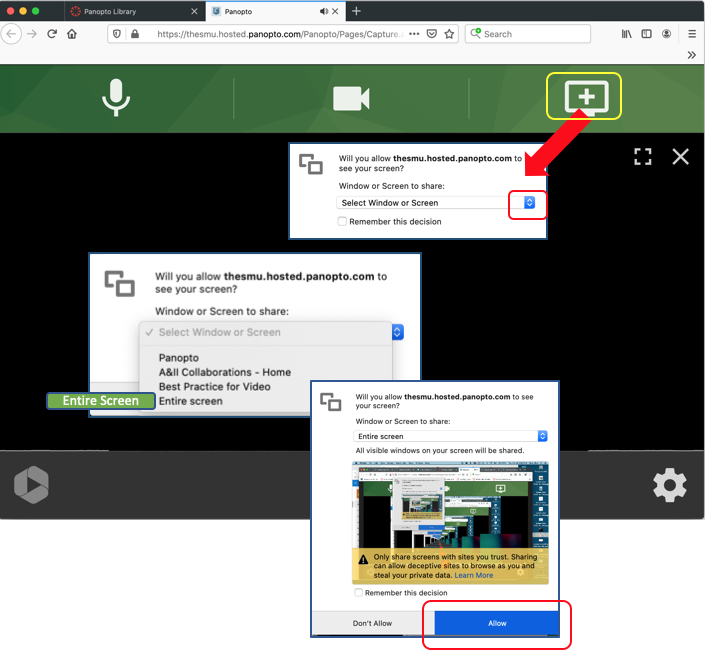
- Click the computer screen icon, "+".
- Select "Entire Screen" (computer screen) -- (especially if you are using PPT).
- Click "Allow" the "Entire Screen" for recording multiple apps and documents; or, the "Window" to show the contents of one of your open "apps" (Word, Excel, web browser, etc... If not sure, select "Entire Screen".
Then, click "Share".
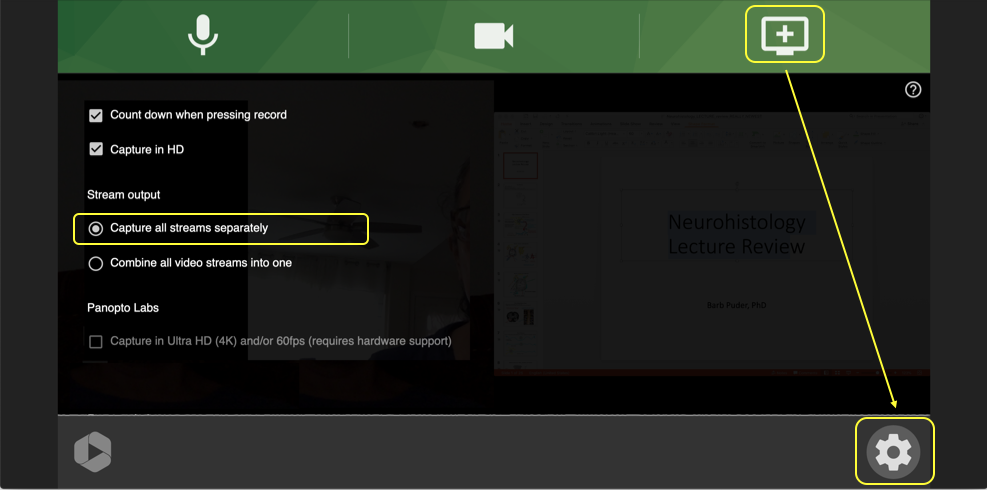
- Select how you want to capture streams. (Video/Audio is one stream, screen capture is another stream). Use the recommended settings below:
- Click the settings gear at the bottom of the window.
- Check "Count down when pressing record".
- Check "Capture in HD".
- Select"Capture all streams separately", then click the settings gear to go back to the recording window.
- Click the settings gear at the bottom of the window to return to the record mode.
- Click "Record" to start recording. (smile and wait 5 seconds before you start talking).

- Click "Stop" to end the recording. (smile and wait 5 seconds before you click stop).
.
Immediately, set the PowerPoint presentation to slide show (or a website or document to full screen view), and begin narrating and navigating your PowerPoint, or other document.
(To toggle between PowerPoint, web or documents, hover over the computer dock at the bottom of your computer screen. This will reveal the apps you're using. Choose the app/document)
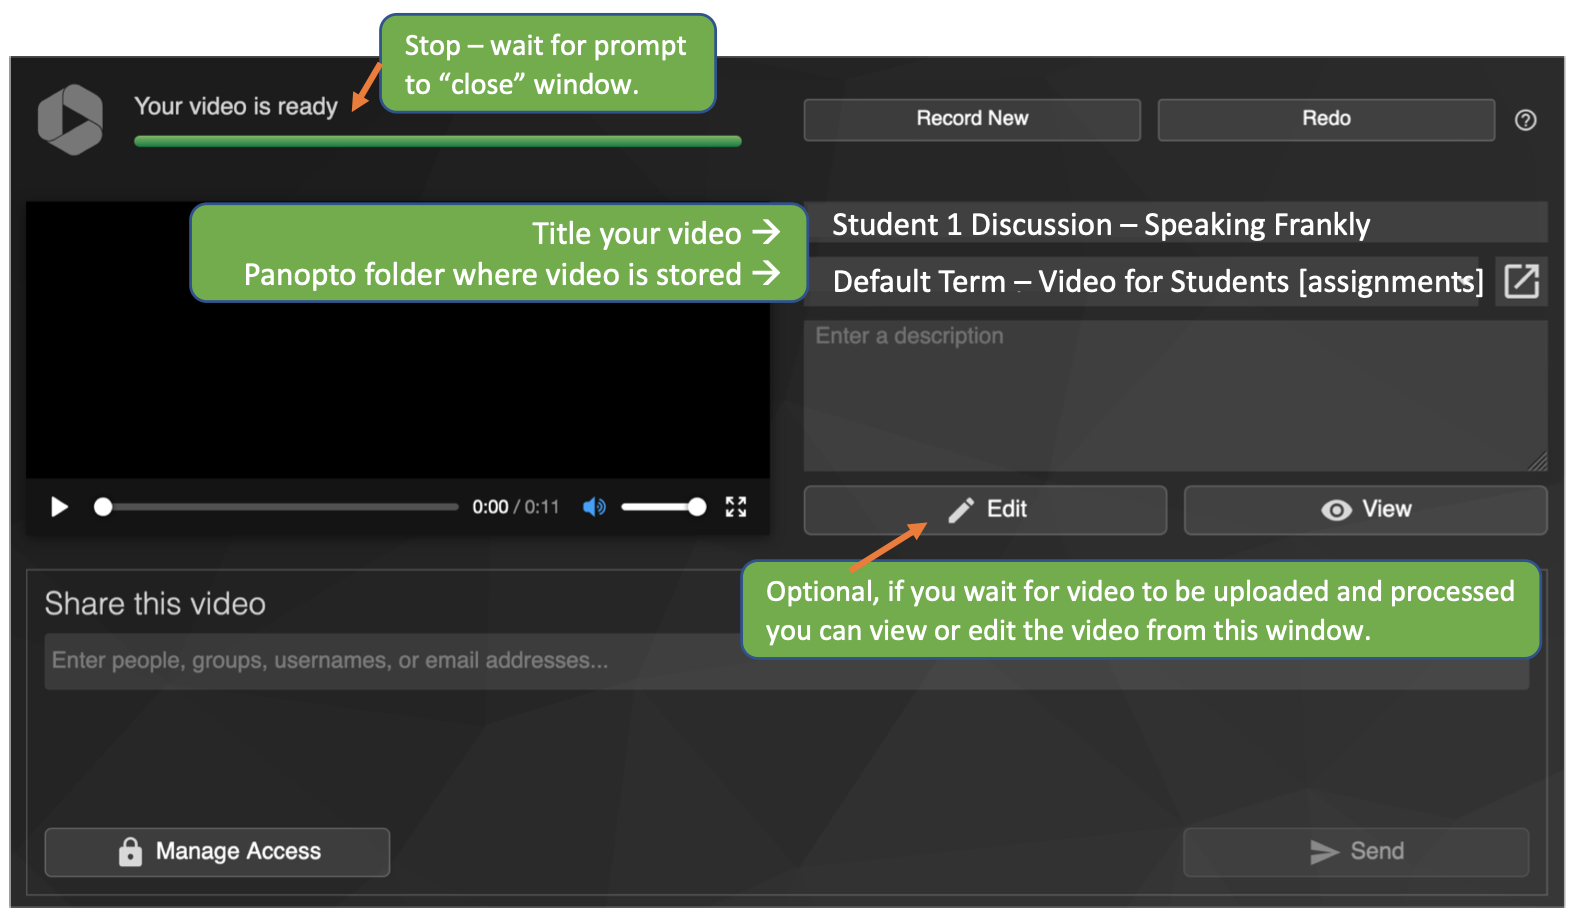
- While you wait for the video to upload:
- Type the "title" of your video.
- Make sure the video is stored in the Panopto[assignments] folder for your course. If not, click the Panopto folder downward arrow and select the correct Panopto folder.
Wait until you see the "it's okay to close" prompt appears above green status bar . The "okay" means the video is fully uploaded.
This is how your Recording (Video/Audio+PowerPoint) will display when playing in the Panopto Viewer:
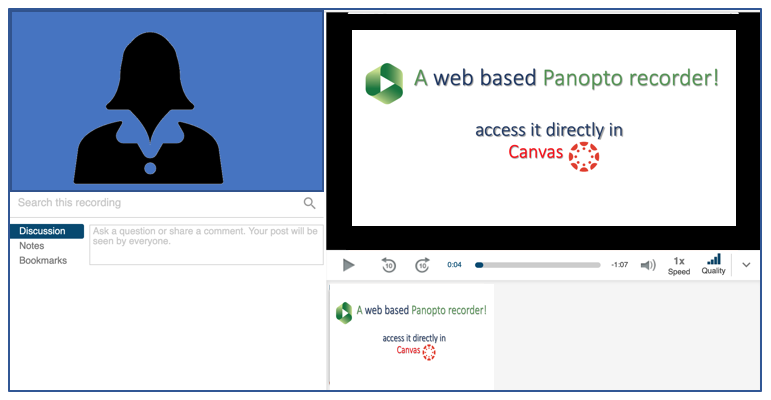
- To access the video, return to the Canvas course, select the "Panopto Library" tab, open the [assignments] folder for the course.
(2) What to do with the video now? Choose one option:
(2a) "Post a Reply" in a Canvas Discussion
(2b) Or "Submit" a Video Assignment
(2a) Post a Reply in a Canvas Discussion
- Open the Canvas course.
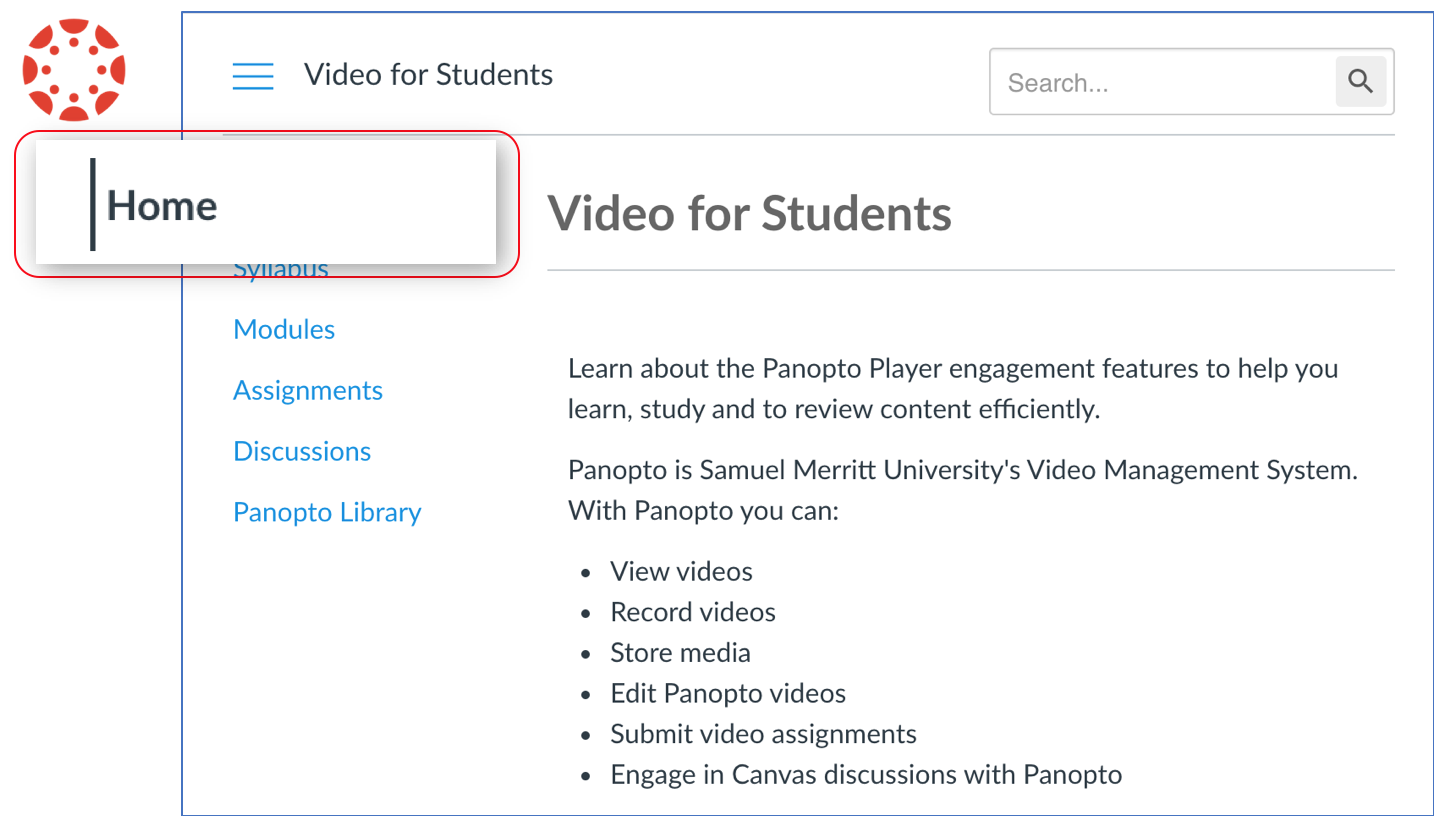
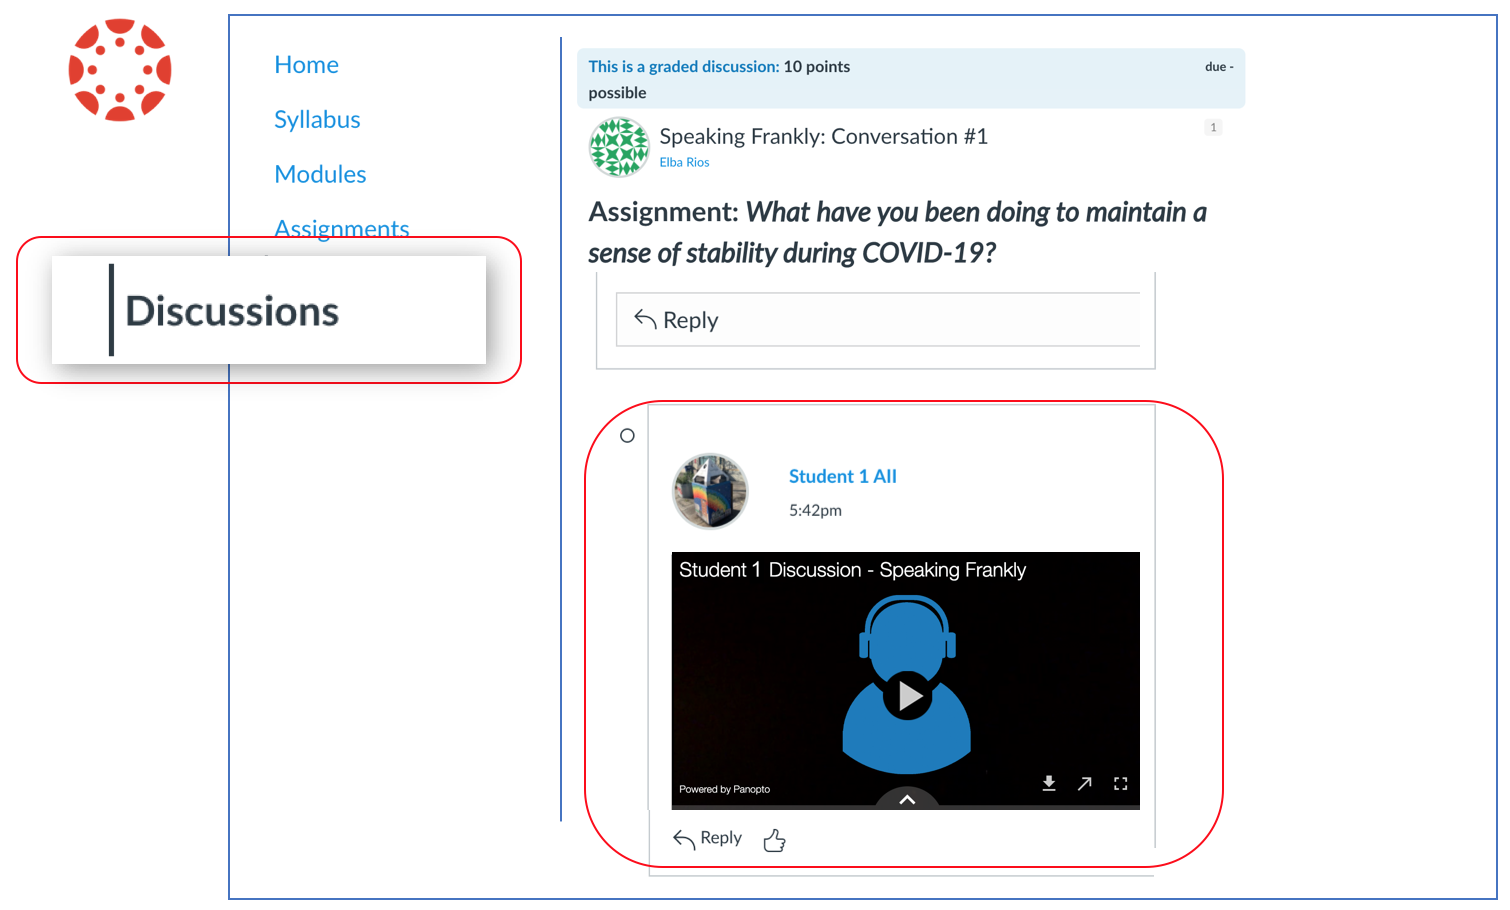
- Open the "Discussions" assignment and click "Reply". (You can reply to the original post. Or, you can reply to someone's post).
(Note: If you do not see the "Discussions" Canvas tab, access the discussion assignment in Modules.)
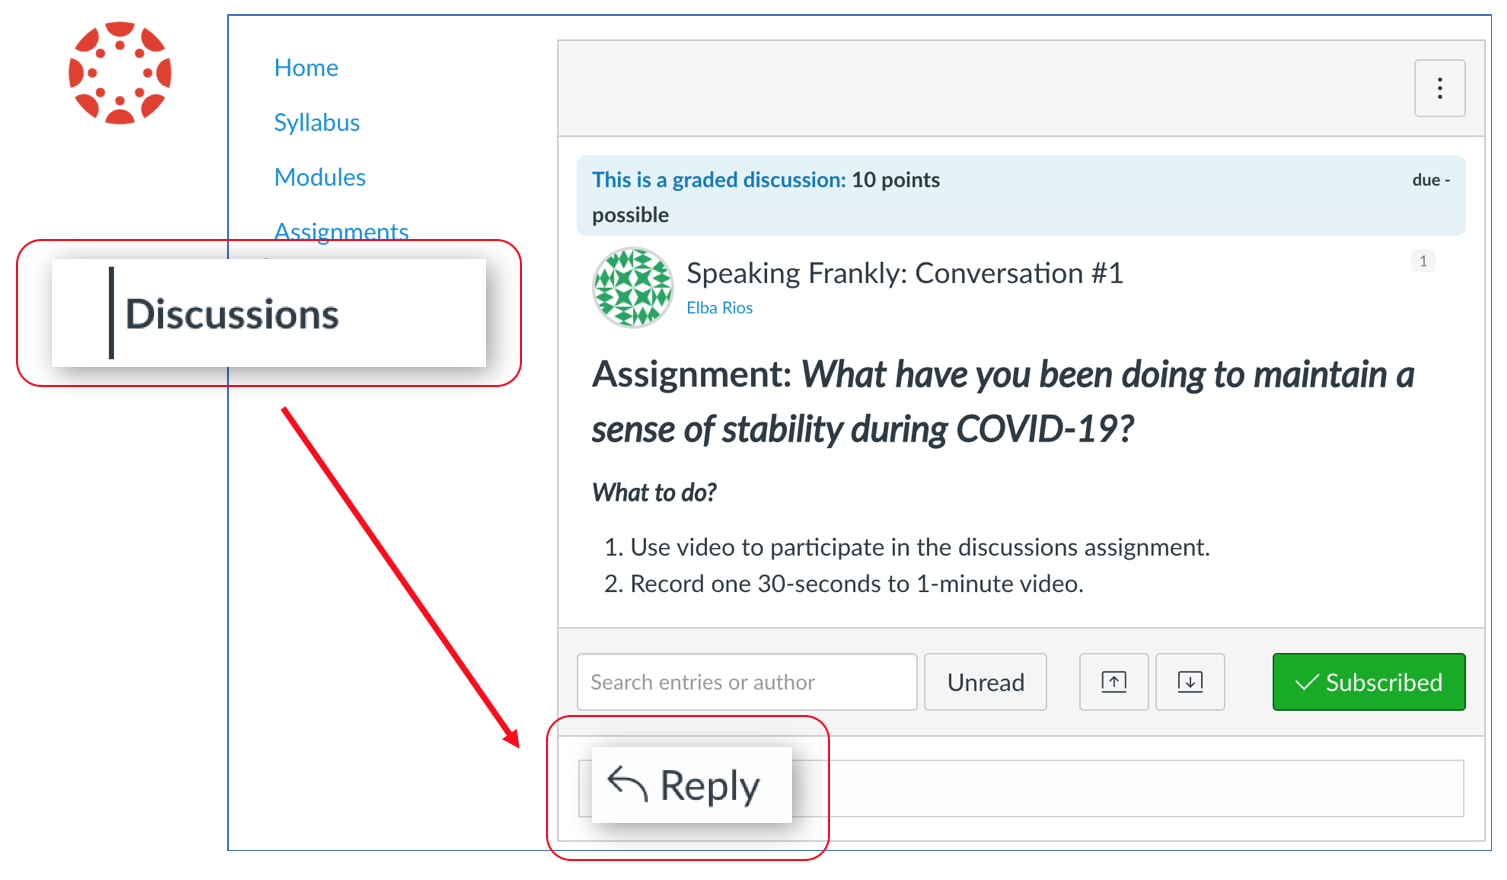
- In the Rich Content Editor select the the plug icon, and then choose the "Panopto Library" option.
(Note: If you do not see the plug icon, click the three line dots to reveal hidden options.)
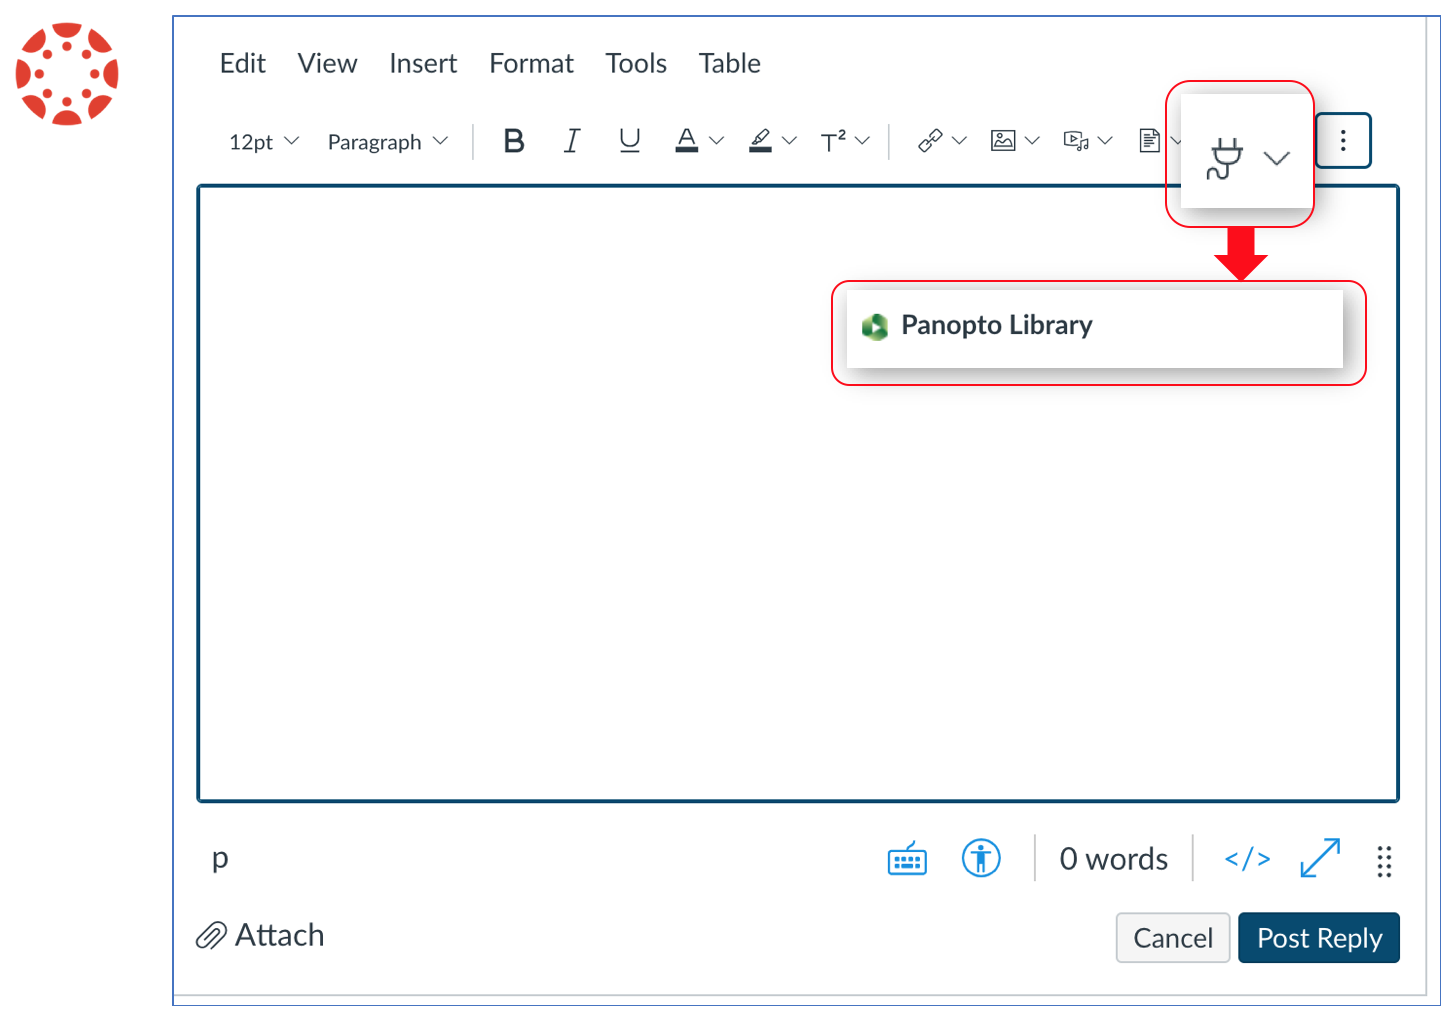
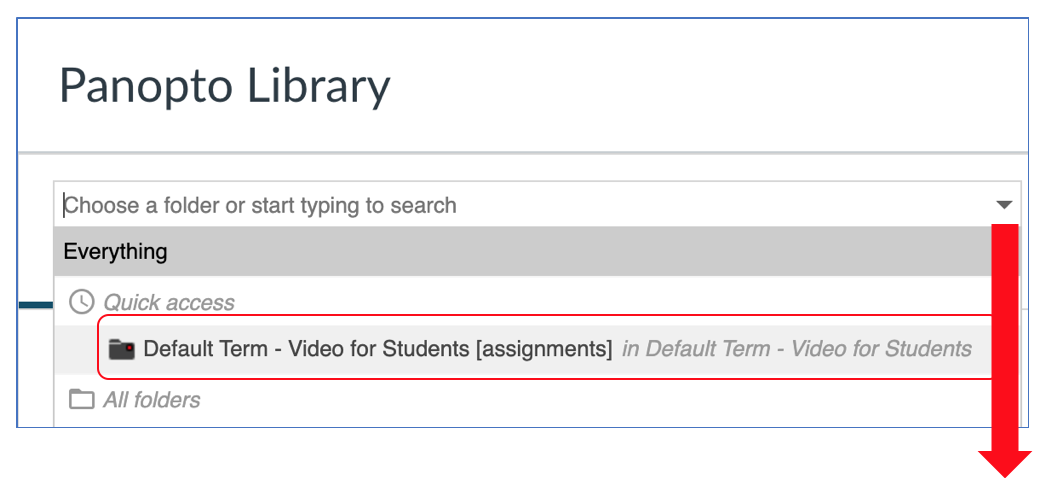
- In the "Choose" mode, click "Everything" to find the Panopto Folder where your video is stored. You can click the pulldown arrow to reveal folders, or you can type the official course name.

- Select the Panopto Assignments folder for the course. Notice "assignments" is written in "[ ]" brackets.
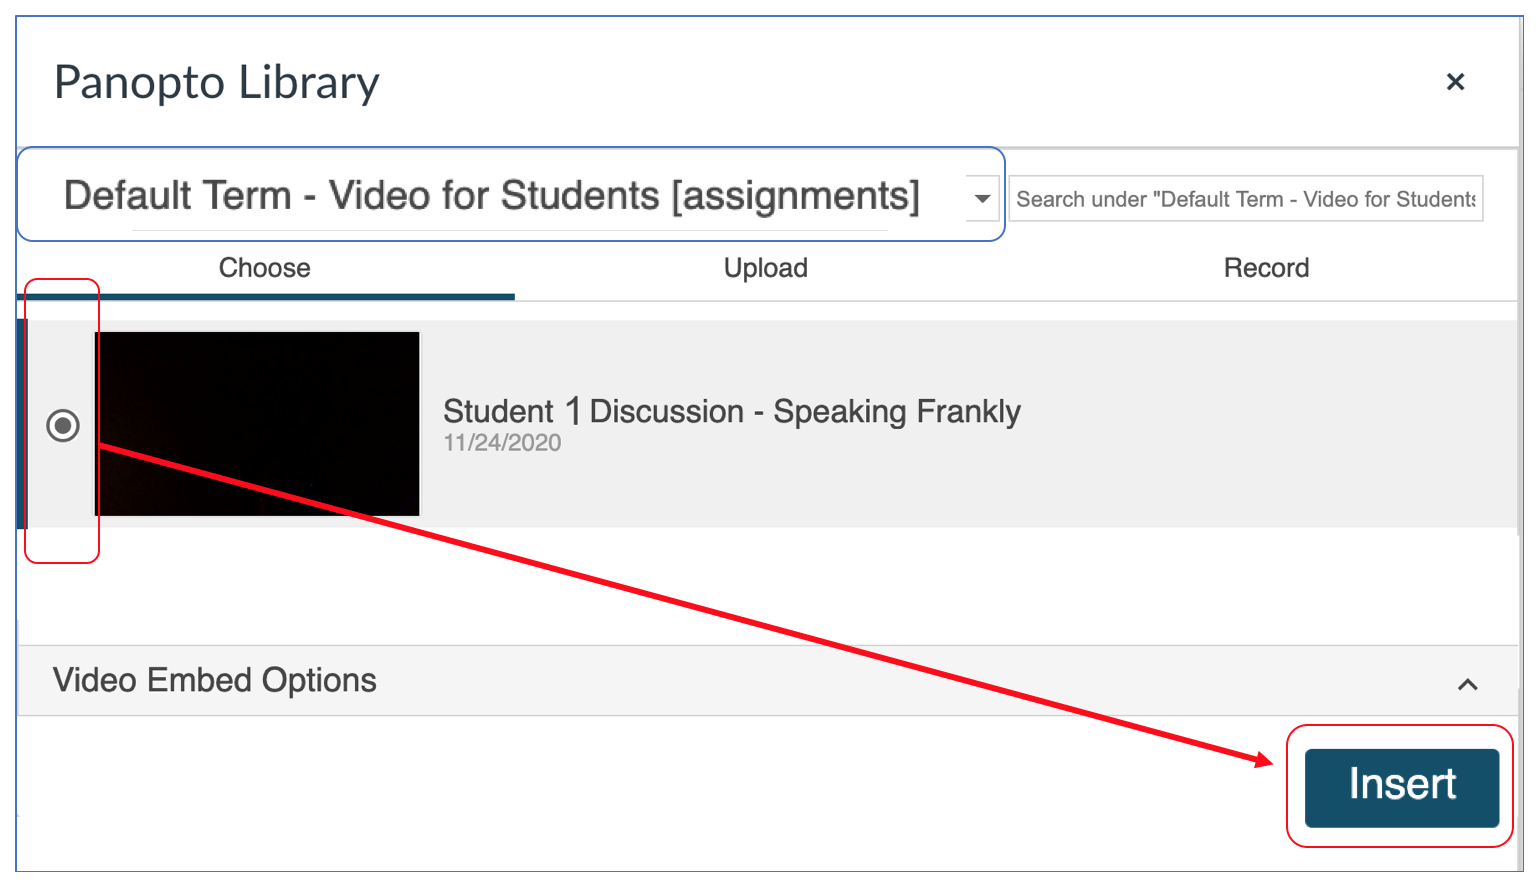
- Select the video and click "Insert".
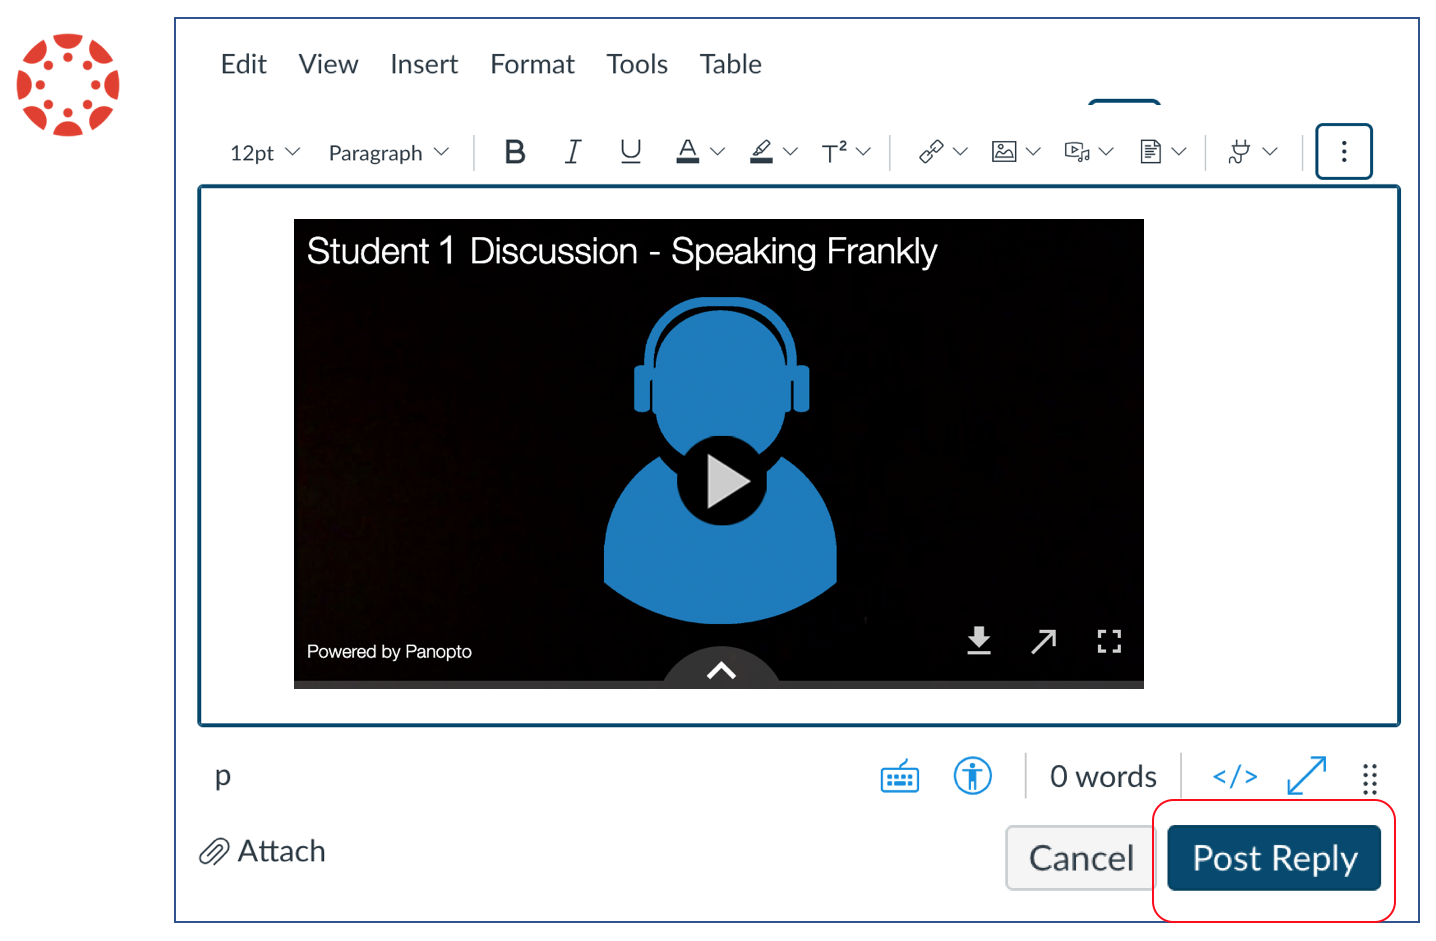
- Click "Post Reply".
- Preview the reply in the discussions assignment to verify your video reply has been posted.
(2b) Submit a Video assignment
- Open the assignment.
- Click “Submit Assignment:”

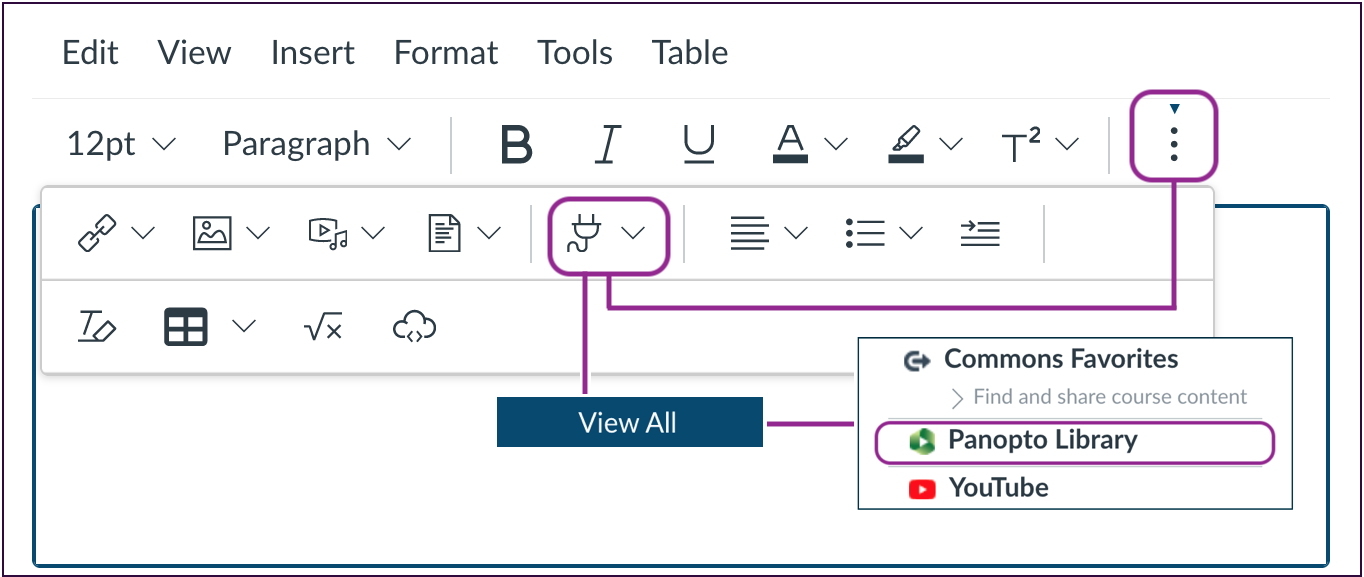
- Choose the Panopto Library media option in the Rich Content Editor.
(Note: If not visible, click the three dots to reveal the "plug icon". Follow the purple line below.)
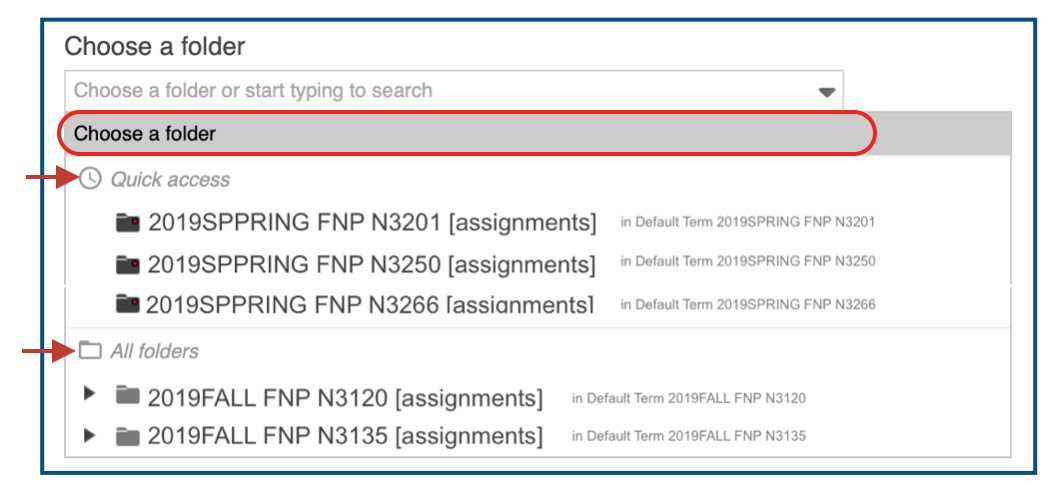
- Choose the assignments folder for your course by clicking the dropdown menu:

The “Quick access” list displays all the assignment folders you’ve accessed recently.
The “All folders” list displays the assignment folder for each course you’re enrolled in (past or present).
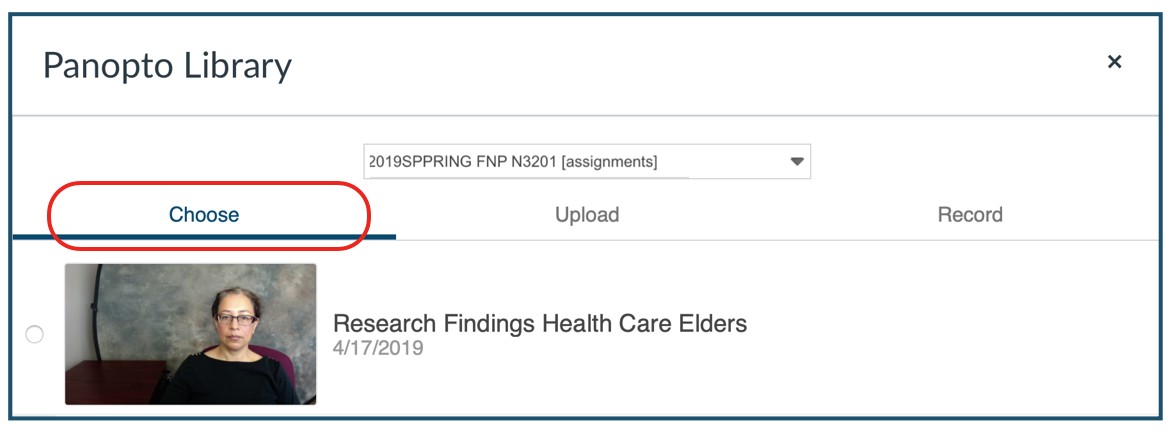
- Click “Choose”
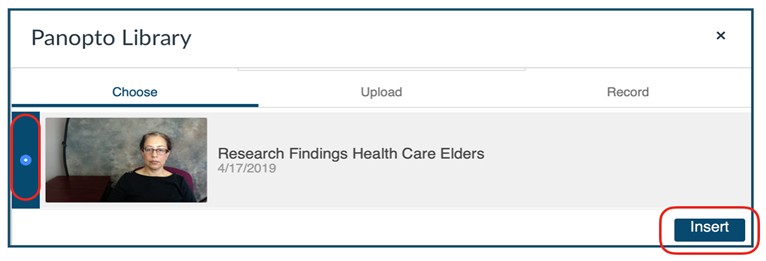
- Click the radio button to the left of your video, then click the “Insert” button to send the video to Canvas (you may have to scroll down to see the button):
- Type a comment or note to your instructor in the “Comments” box, then click “Submit Assignment:”
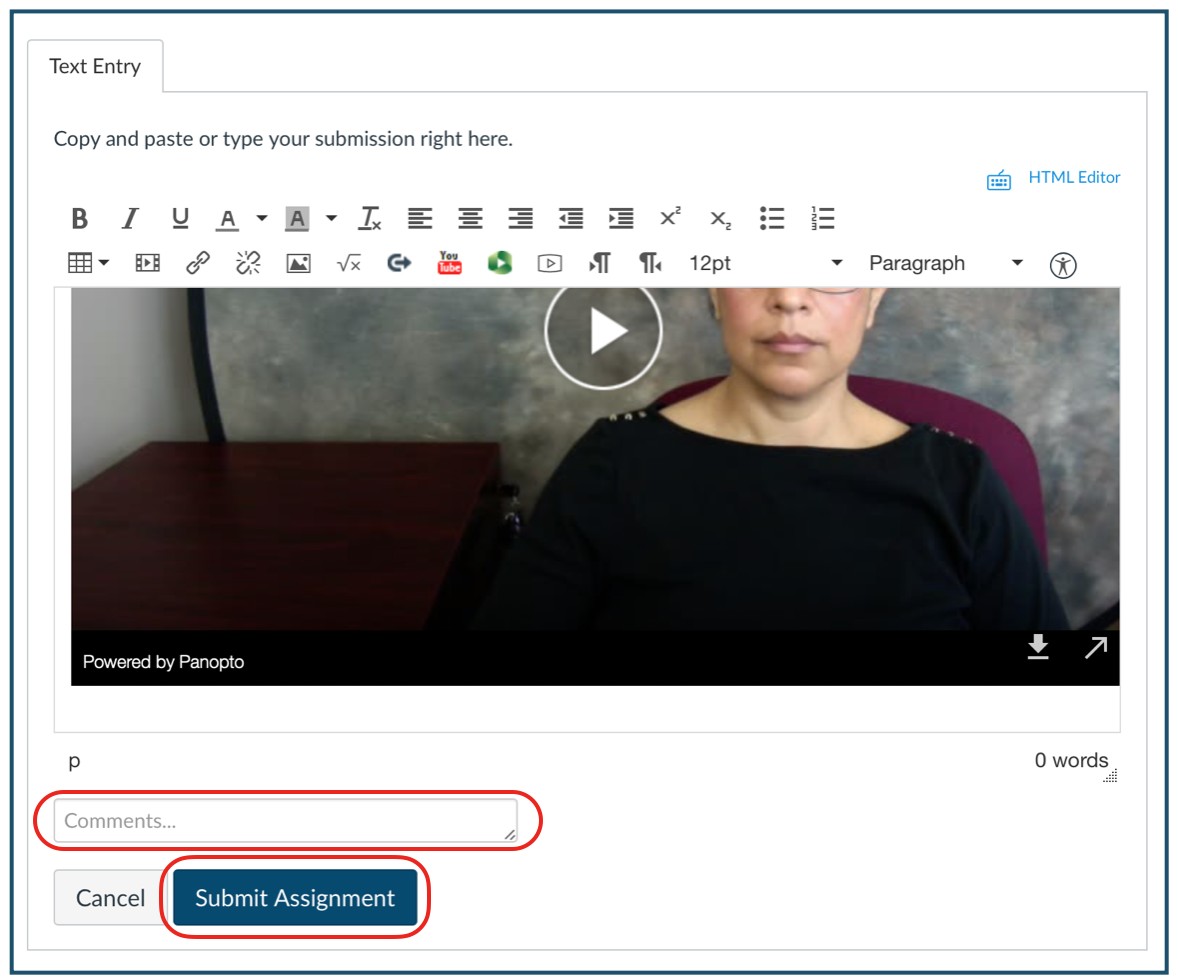
- The message “Assignment successfully submitted” will pop up to confirm your submission:


